Friday 30 August 2013

New blog post for IndigoBlu

Morning everyone, quick post from me, I am headed to Swindon via the Stamp Attic, spending the weekend with good people and Anna AKA Finnabair, so excited!

Anyhow enough excited babble from me! New blog post for IndigoBlu!


Thanks for visiting!
Clare

Friday 23 August 2013

Published!

Just got my copy of the Create and Craft club magazine to find that not only is there a HUGE spread of IndigoBlu wedding cards and a full article by my lovely teamie Linda on page 10 and 11, but I am also in the magazine on page 29! I am not mentioned by name but I see some of my projects in the display whooop whooop!


Sooo happy right now, bouncing around the walls!

Thanks for visiting

Clare

Wednesday 21 August 2013

IndigoBlu Challenge 7

Hi everyone, today is IndigoBlu Challenge day and this months challenge is shabby chic. Quite a difficult one without using yards of lace and pre made paper flowers. I decided to decorate a frame that Kay had given me aaagggeeesss ago as a little present for myself. I had not done anything with it yet so decided to use it for the challenge and I will be keeping it because I love it too!.


First I removed the heart section as it was paper and acetate then painted the whole thing with the IndigoBlu Gee-so-good gesso. Once dry I gave it a coat of Frosty Sky IndigoBlu paint. Once that was dry I dry brushed the edges in random place's with the Pantry White IndigoBlu paint. Also in the Pantry White I randomly stamped the script stamp.


I edged the whole piece with the  Iced Spruce Distress Ink and then stamped the vintage flourish IndogBlu stamp and gilded with Sheffield Steel mega Flake. The words are from the Live Laugh love stamp plate and stamped with Vintage Sepia Versafine Ink.

Thanks for visiting

Clare

Monday 19 August 2013

Pebeo Fantasy Prisme and Ice Resin

Hi everyone, I have recently bought myself a discovery set of Pebeo Fantasy Prisme effects paint, it was very inexpensive and I figured that it would be better to get a taster set to see if I liked it and it actually did what it says on the box rather than paying full whack for a few tubs. In the set you get 6 pots of different colours. I got mine from the Skipton Art Shop, fantastic service from them by the way and fantastic prices too.

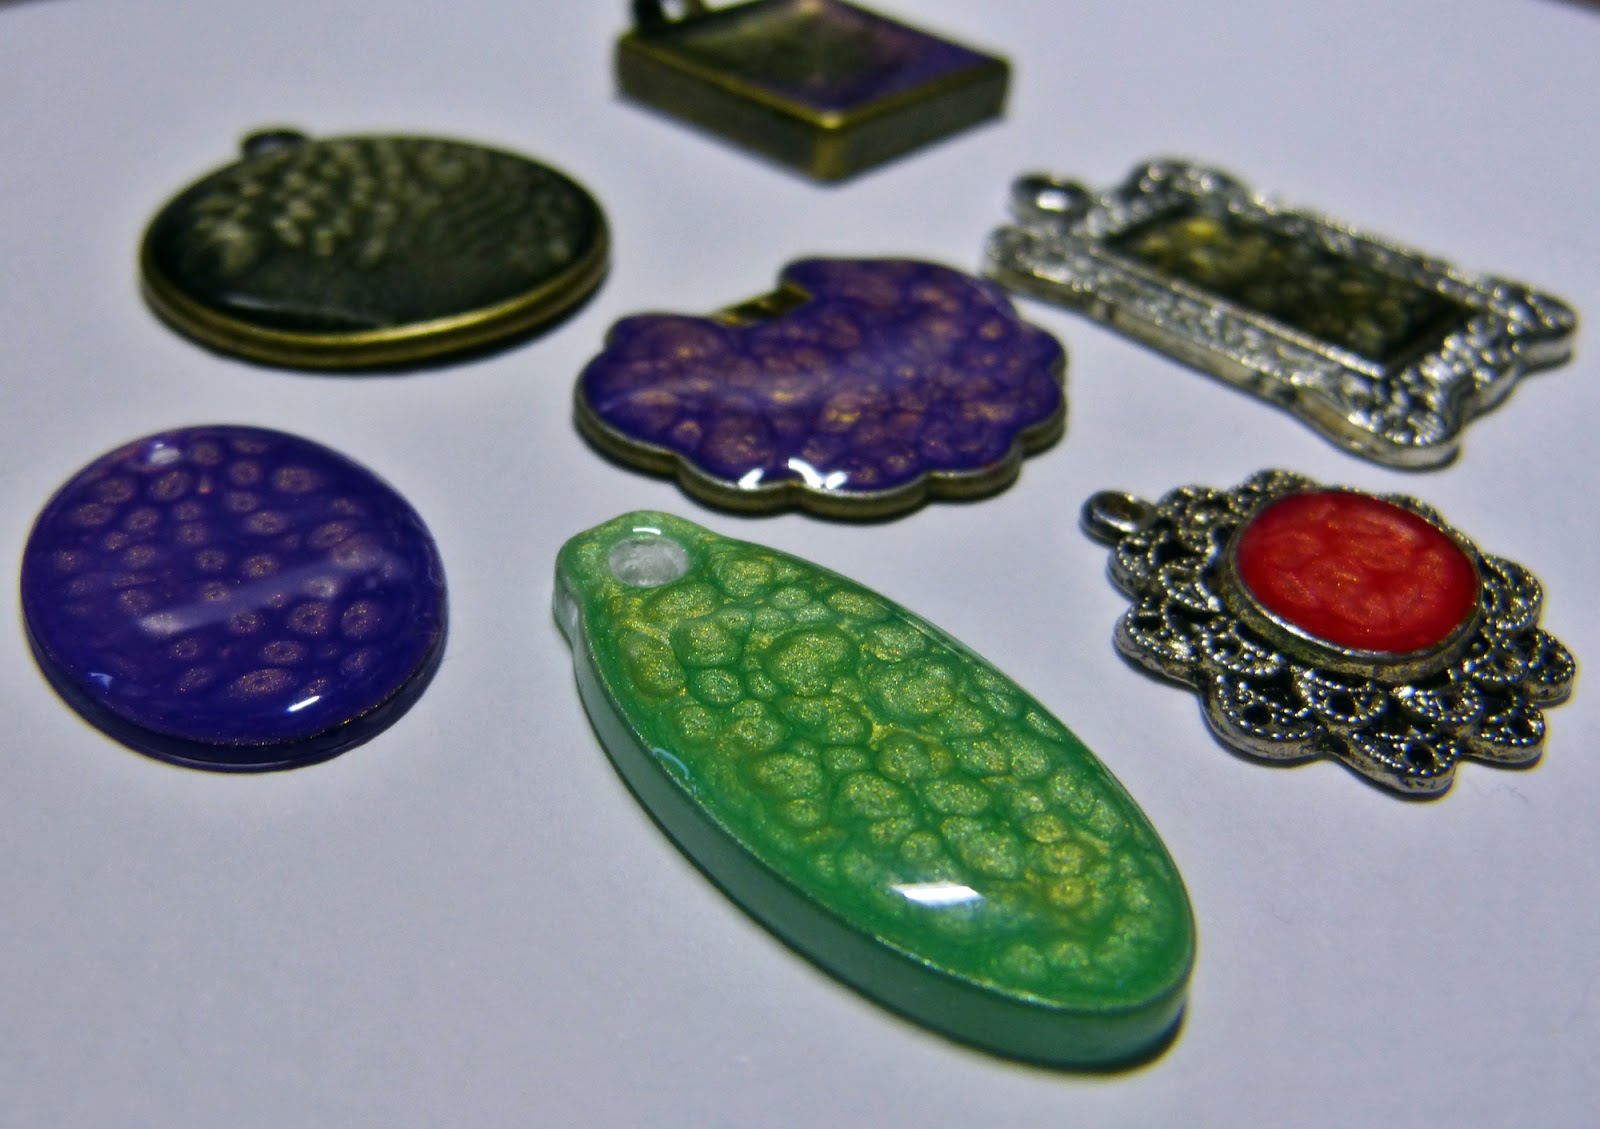
So I took a load of random items and had a play. Ranging from bezels to oriental coins, the kind you got with kits from shopping TV when oriental was all the rage years ago, to fragments from Ranger and style stones.


So I followed the instructions, and dripped away in the sections I wanted to colour. I found out a few things. Either my white is faulty or it was too old. It did not work as it should, the consistency of it was nothing like the others and it was clumpy and lumpy no matter how much I stirred and shook it.

The colours are not as easy to blend as they show you in the youtube video's. Mine did not go anything like I had expected from watching them video's.

The following pictures were taken just after I had put in the Prisme solutions and had not dried.


 This first one was mixed black with gold. It kind of worked but did not come out how I had expected or wanted it to.


This one I came out just red, so I turned it over and did just black on its own on the back.


This one I had to do twice, the first time it did not work at all. The second time it came out better


 This one is a Ranger fragment and came out brilliantly just how I wanted it to.


This one the red vanished completely and just looked purple. Once dry the oriental embossing came back through, but covering it with resin made that disappear.

So as you can see not all of them are photographed, I didn't want to show them all as they all had similar things wrong with them. I covered the whole lot with Ice Resin and intend to make them into finished pieces next week.


You can see from the finished Resin pieces that they all do look pretty good even though they didn't turn out as I had intended. I just need to put resin on the back of the circle one, the red side and a final doming layer on the deep black and purple one, top right of the above picture.


I will show the pieces singly, as I finish them.

Thanks for visiting

Clare

Friday 16 August 2013

Matching Christmas Card and tag

Hi everyone, today over at IndigoBlu I have created a matching tag and card set. I have used an idea from a lady I watch quite often on youtube called The Frugal Crafter. She is really funny and has some great ideas. I wont explain how it is done but I have added her link so click on her name above and go watch for yourself.


I used the stamps from the recent Christmas Cracker deal that was on Create and Craft TV. The Large Snowflake, Baubles Flourish and the Dinkie I Wish You a Merry Christmas. Inks used are Versafine Vintage Sepia and Distress inks Shabby Shutters and Vintage Photo. The baubles themselves are done with Royal Peacock gilding flake. The ribbon and bead ribbon were in the bottom of my ribbon drawer and now used up.


I am on a mission at the moment to use up the scraps of things I have instead of opening/buying new stash. I have several projects also to share over the next couple of weeks now that the other half is back to work after his op things are back on track with me also.

Thanks for visiting
Clare

Friday 2 August 2013

Related Posts Plugin for WordPress, Blogger...